From zero to your first playtest
A step-by-step walkthrough to create your first project, design cards from a table, export them and test on the 3D table. It takes about 15 minutes.
The editor is currently in Portuguese. Button and menu names appear in quotes exactly as on screen, with the English meaning in parentheses, and the screenshots show the real interface.
In this guide
Step 1
Create your account
Go to Start for free, enter your email and a password, and confirm your address with the link sent to your inbox.
The first time you sign in, a short assistant asks for your nickname, your profile and a few preferences. The free plan already includes the editor, decks and 3D playtest.
If the confirmation email does not arrive, check your spam folder before asking for another one.

Step 2
Create a project
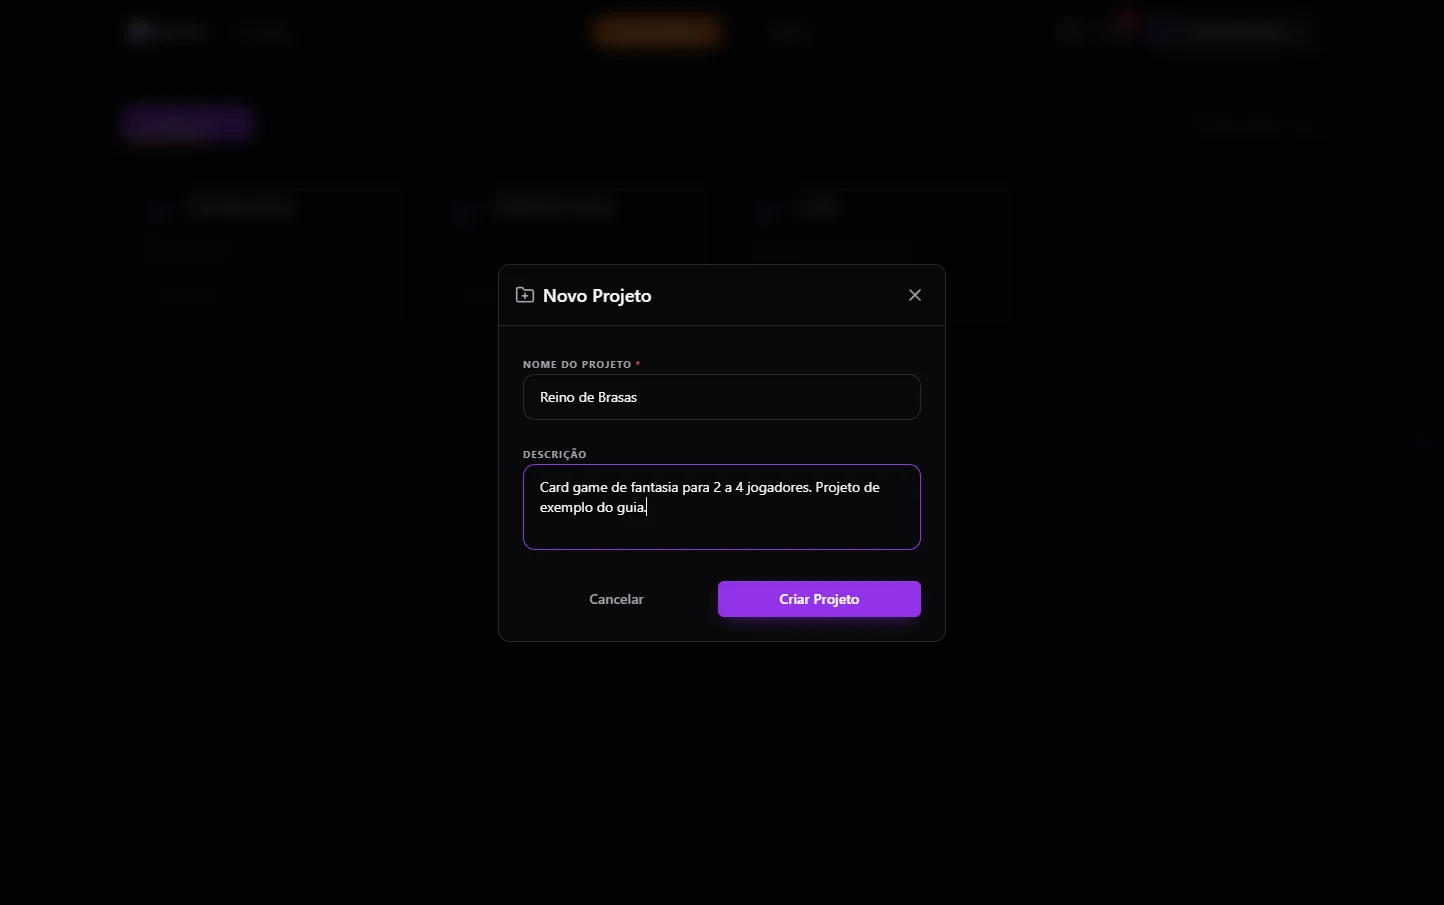
A project is your whole game. On the “Meus Projetos” (My Projects) screen, click Criar (Create), give it a name and, if you like, a description with the theme or rules.
Once it is created, click the project card to open the editor.
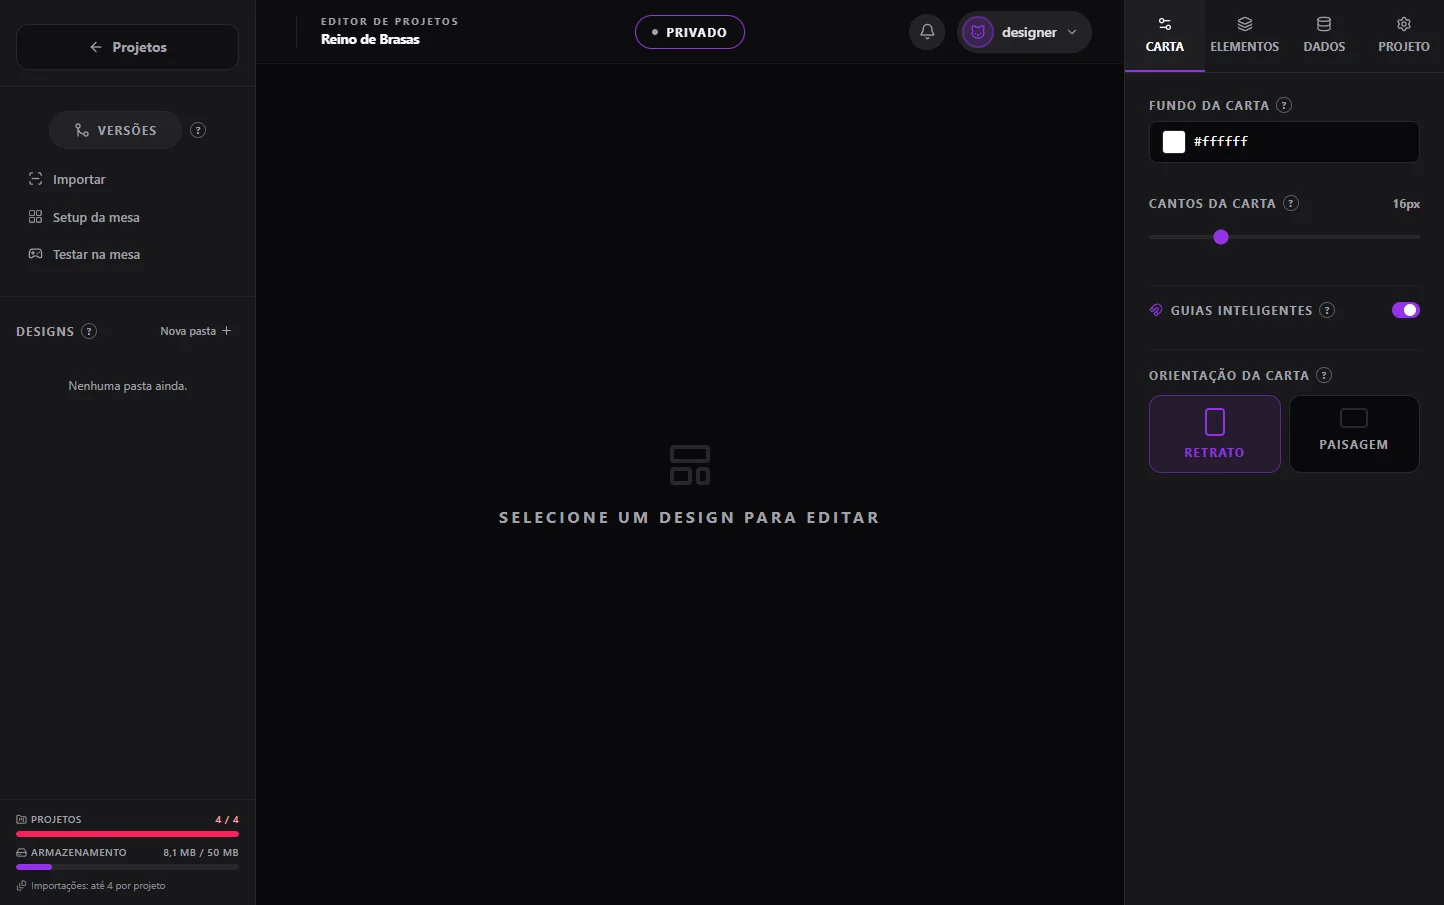
The free plan allows up to 4 projects. The counter next to the button shows how many you have used.
Step 3
Meet the editor
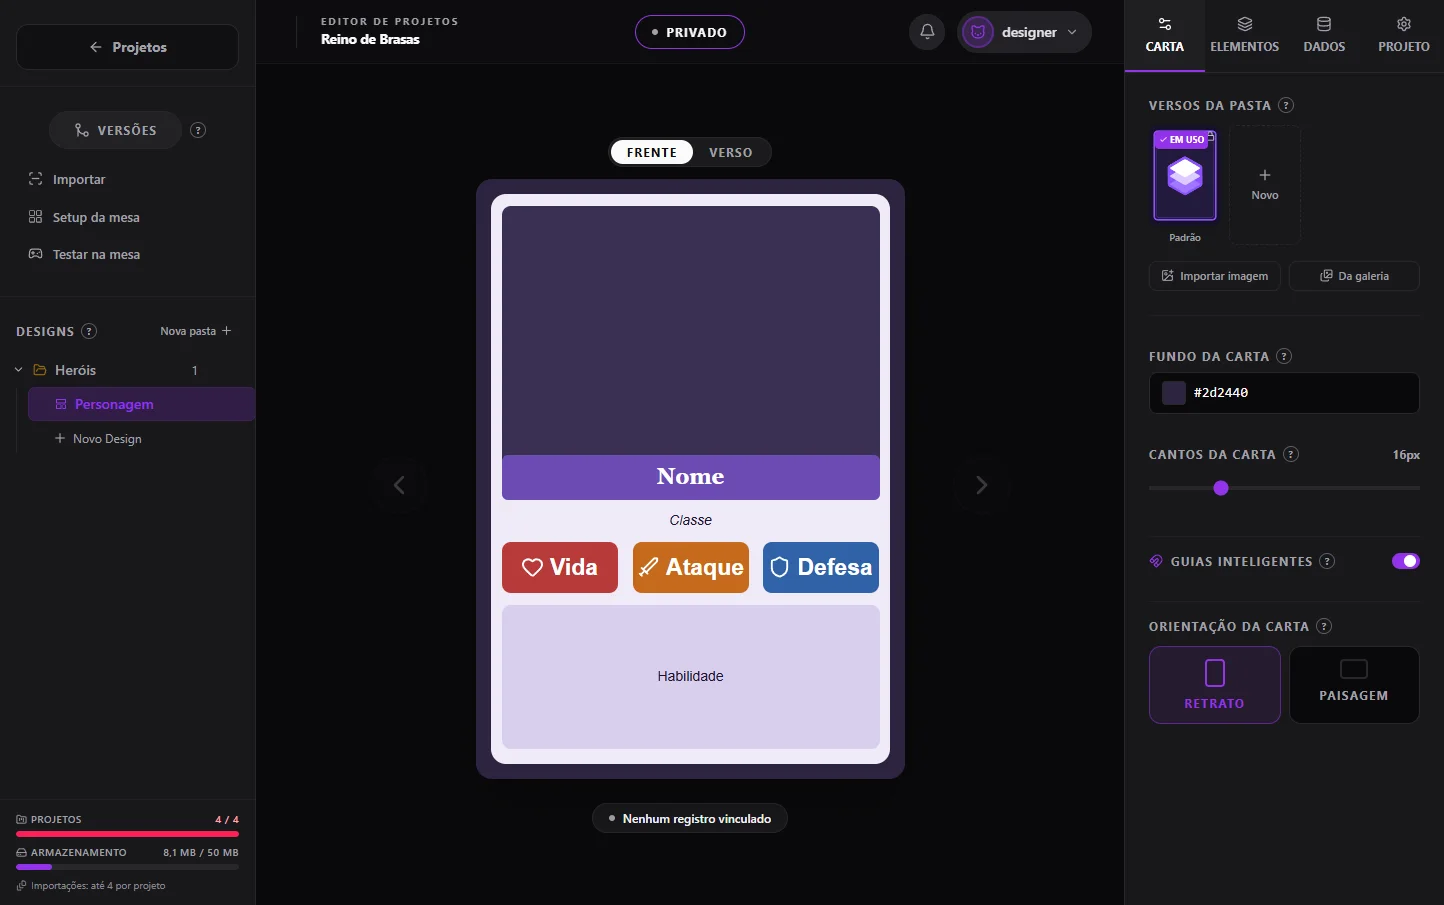
The screen has three areas. On the left are the project tools (Versões for versions, Importar for import, Setup da mesa for table setup and Testar na mesa for playtest) and the Designs tree. The card sits in the middle. On the right are the Carta (Card), Elementos (Elements), Dados (Data) and Projeto (Project) panels.
The hierarchy is simple: a project has folders, and each folder has designs. A design is the visual template for one type of card, and every row of its table becomes a card.
Every “?” bubble explains the feature next to it. Hover or click it to read.
Step 4
Create a folder and a design
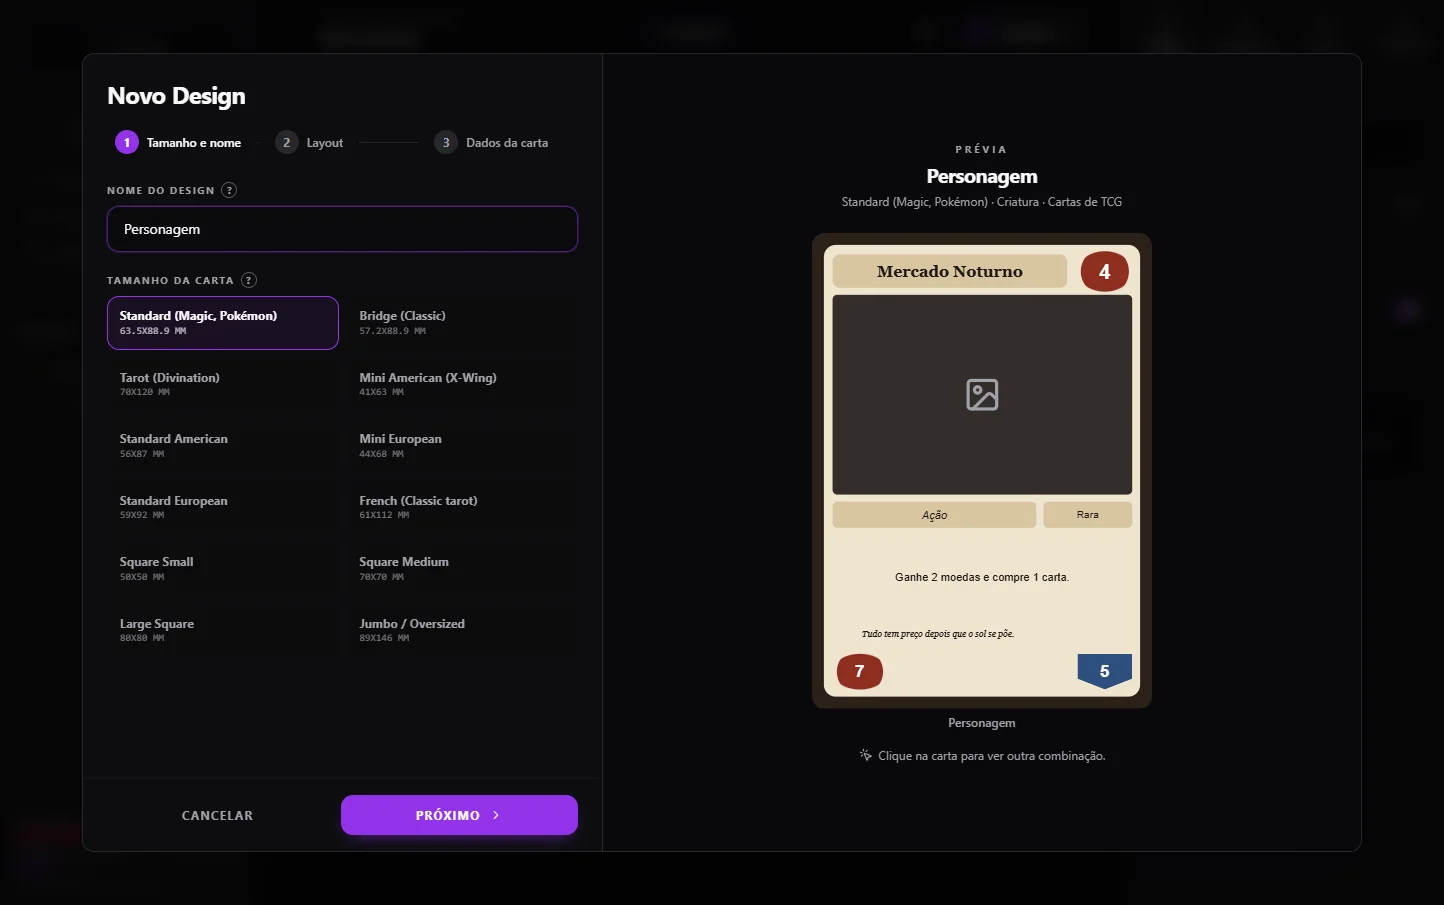
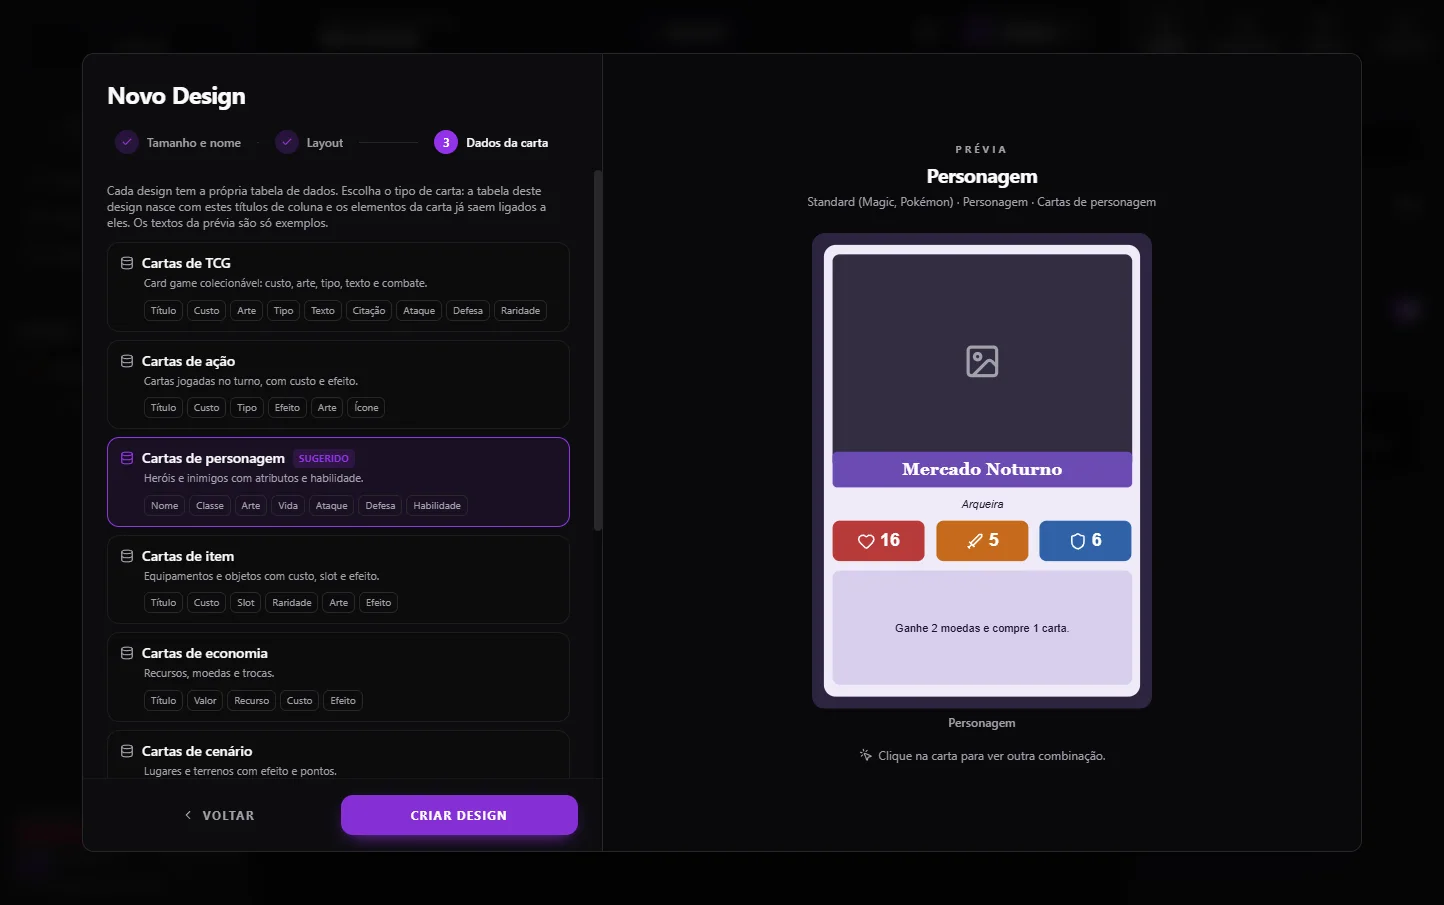
Click Nova pasta (New folder) and name it, for example “Heróis” (Heroes), then click Novo Design (New Design). The assistant has three steps, and you can go back at any time.
1. Size and name. Pick the real dimensions of the printed card, such as Standard (Magic, Pokémon) at 63.5 × 88.9 mm, and name the design.
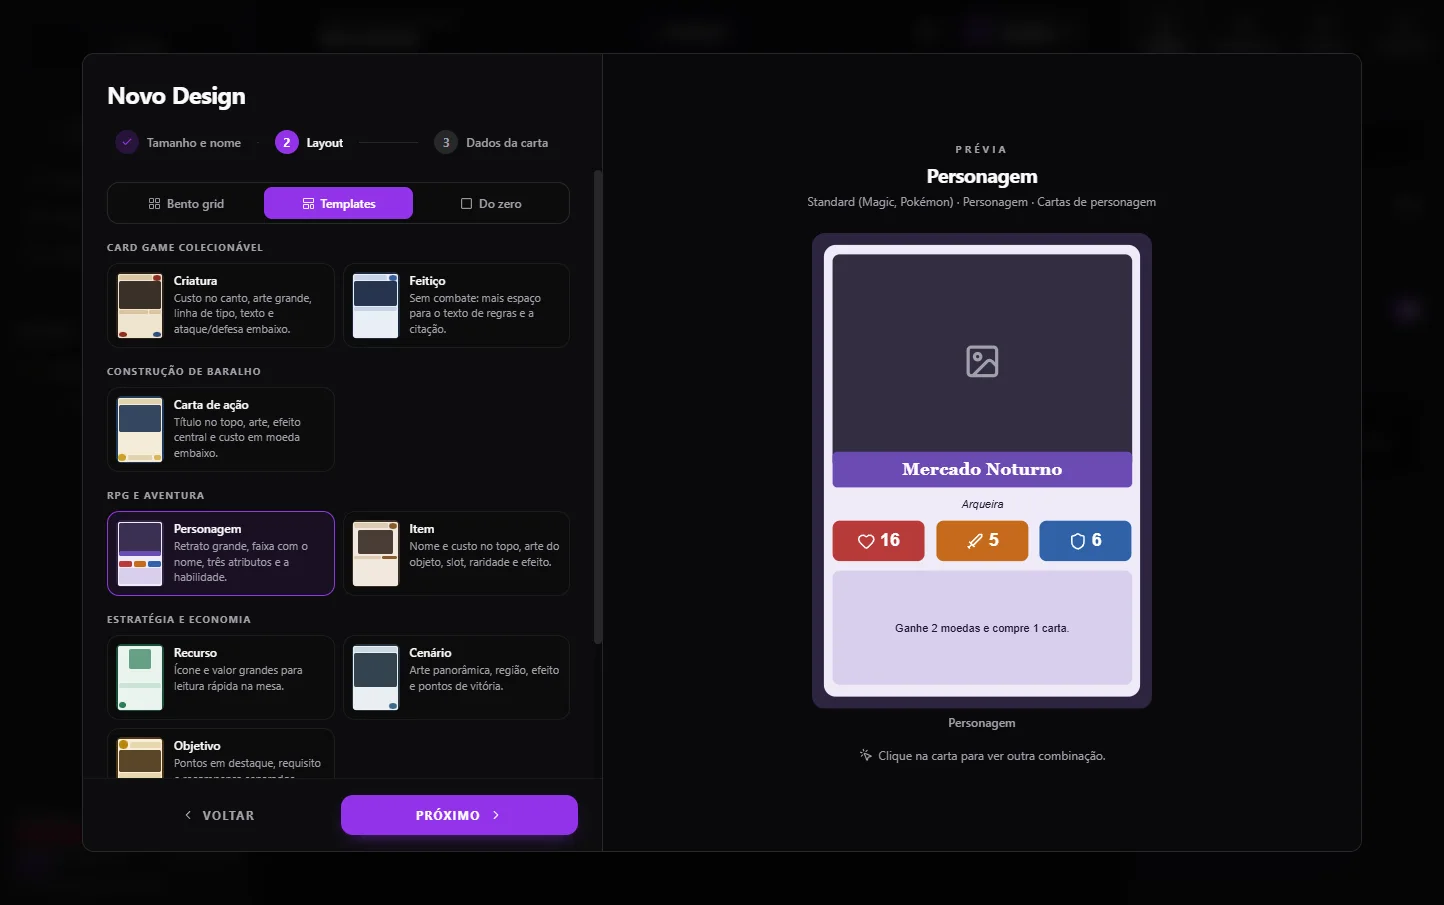
2. Layout. With Bento grid the card is split into automatic panels. Templates are ready-made layouts by game type. Do zero (From scratch) starts blank.
3. Card data. Choose the card type (TCG, action, character, item and more). This creates the columns of the design's table, with titles ready, and links the card elements to them.
Click the preview card to flip it and see another combination of colors and layout. The preview texts are only examples: the table starts empty.
Step 5
Adjust the card in the editor
After you create it, the design opens in the middle. Each piece of the card is an element: art, title, stats, text. Click an element to edit it; the right panel has background, text, icon and image.
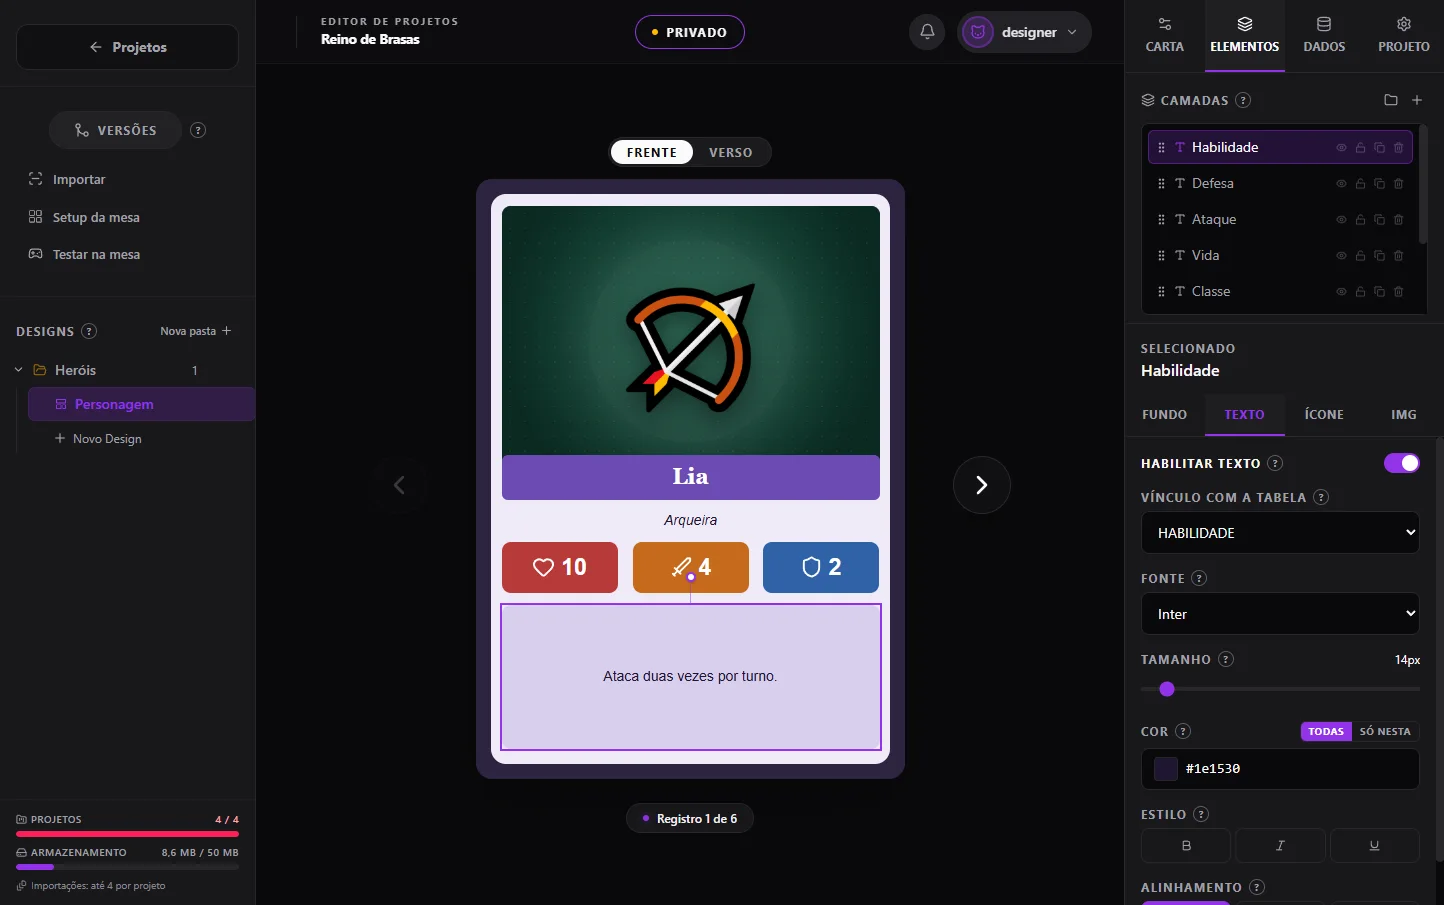
Texts like “Nome” (Name), “Vida” (Health) and “Habilidade” (Ability) are placeholders. They are replaced by each card's data as soon as the table is filled in.
Use the arrows beside the card to move between records and see how each one looks.
Step 6
Fill in the data table
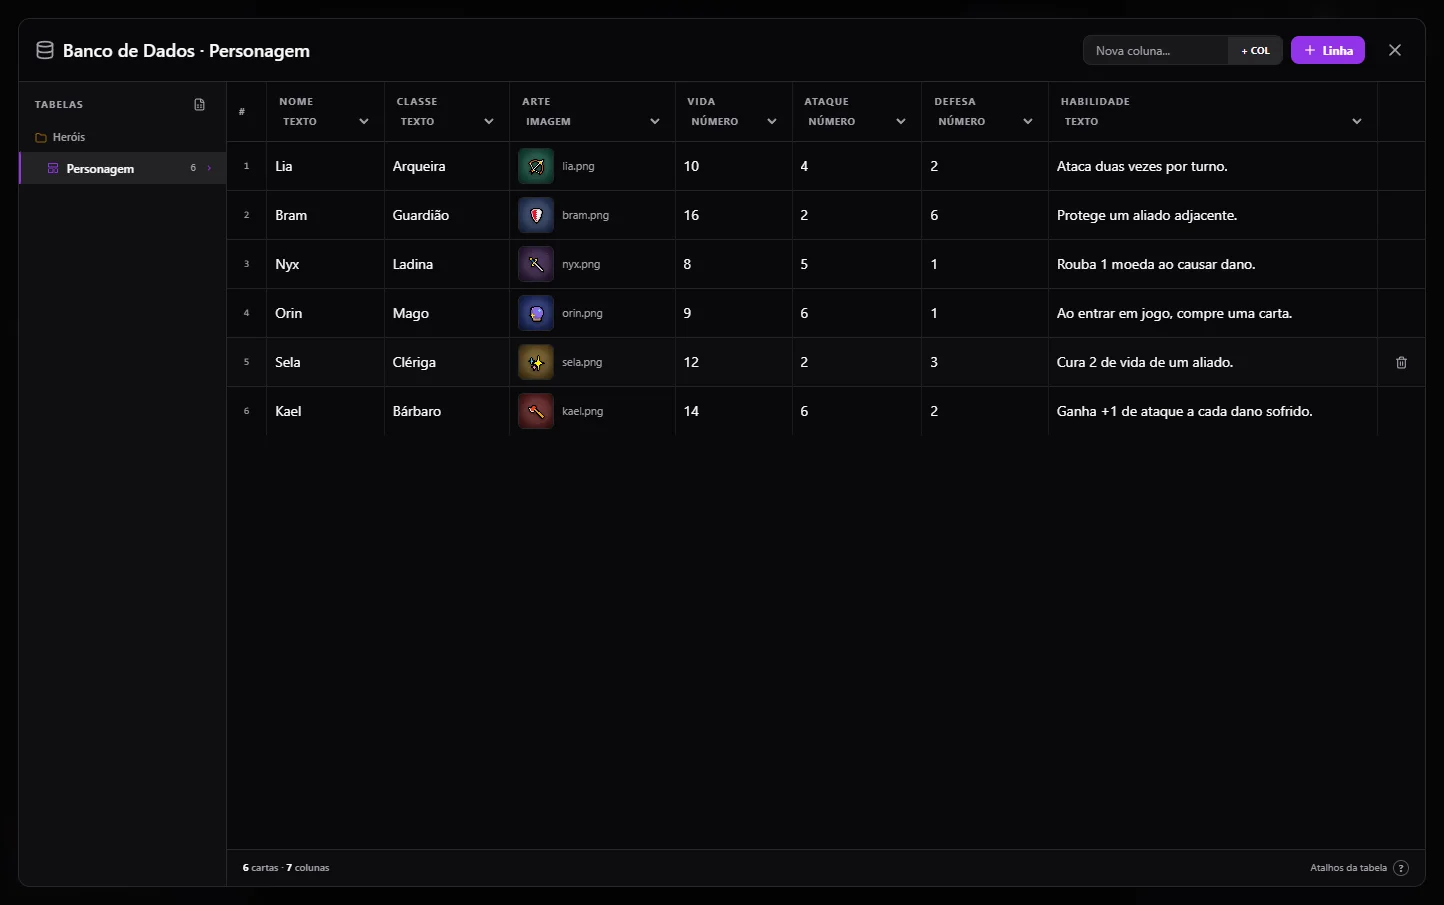
Open the Dados (Data) tab and click Abrir tabela (Open table). Each row becomes a card of this design, and each column is a field, such as name, class or attack.
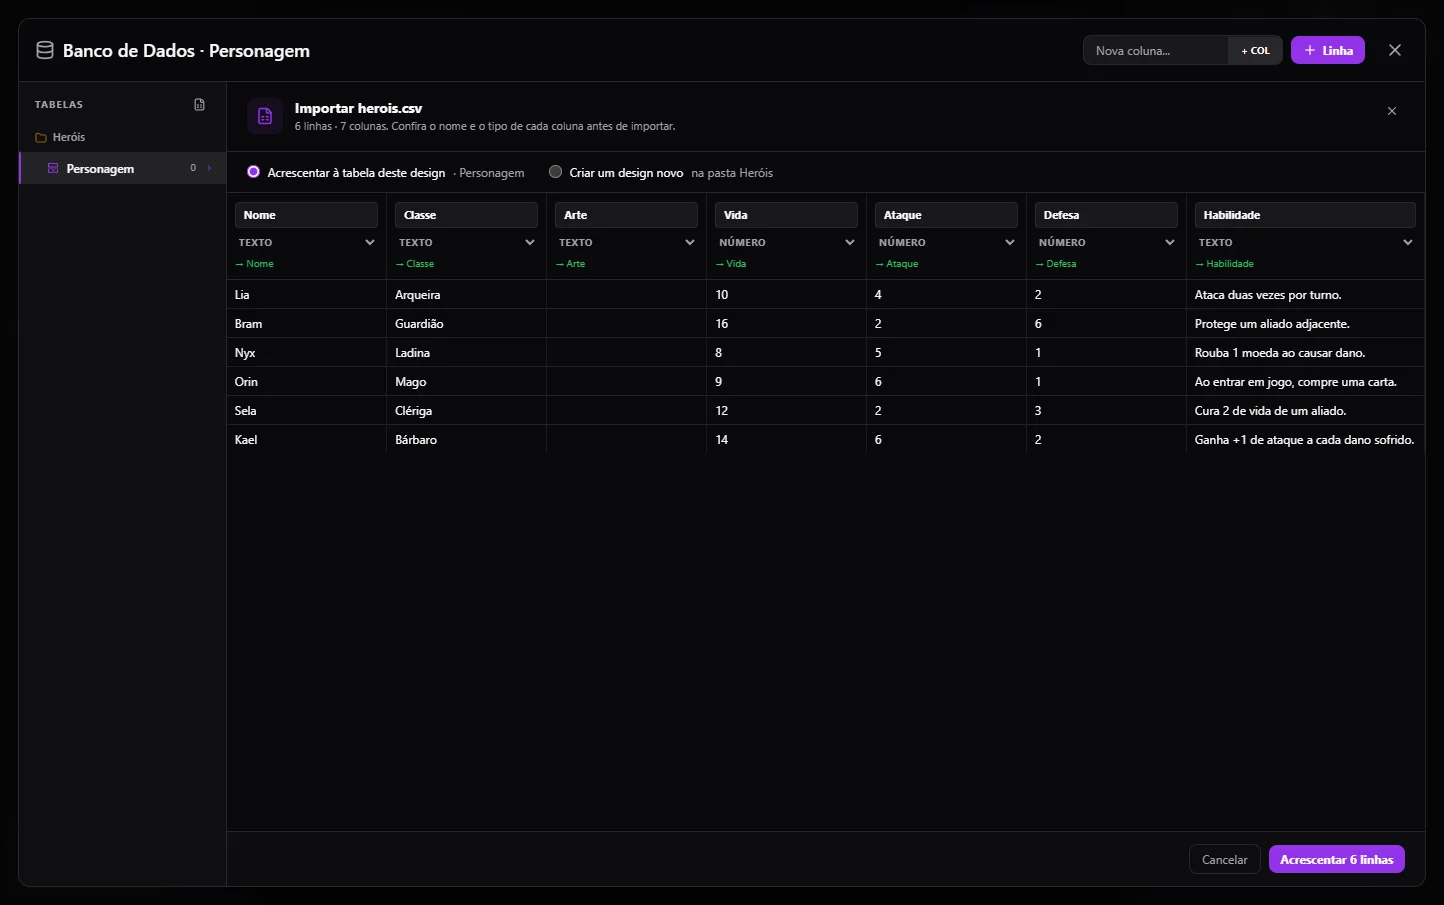
You can type straight into the table with Linha (Row) and + COL, or import a .csv or .xlsx file with the import icon next to “Tabelas” (Tables). The preview shows the first rows and lets you check the name and type of every column before confirming.
Choose Acrescentar à tabela deste design (Add to this design's table) to use the existing columns, or Criar um design novo (Create a new design) to build another design from the file's table.
Each column of the file shows, right below its name, the design column its data goes to.
Step 7
Link elements to data
With the table filled in, the editor card already shows the data from the first row. On each element, the Vínculo com a tabela (Table link) field sets which column it reads from. That is how “Habilidade” shows the right text on every card.
For art, the image element has two options in the IMG tab: Todas as cartas (All cards), with one shared image, or Só esta carta (Only this card). You can also pick the image straight from the table's image column, one per row.
To change a card's text or art, edit its row in the table. The design stays the same.
Step 8
Set the card back
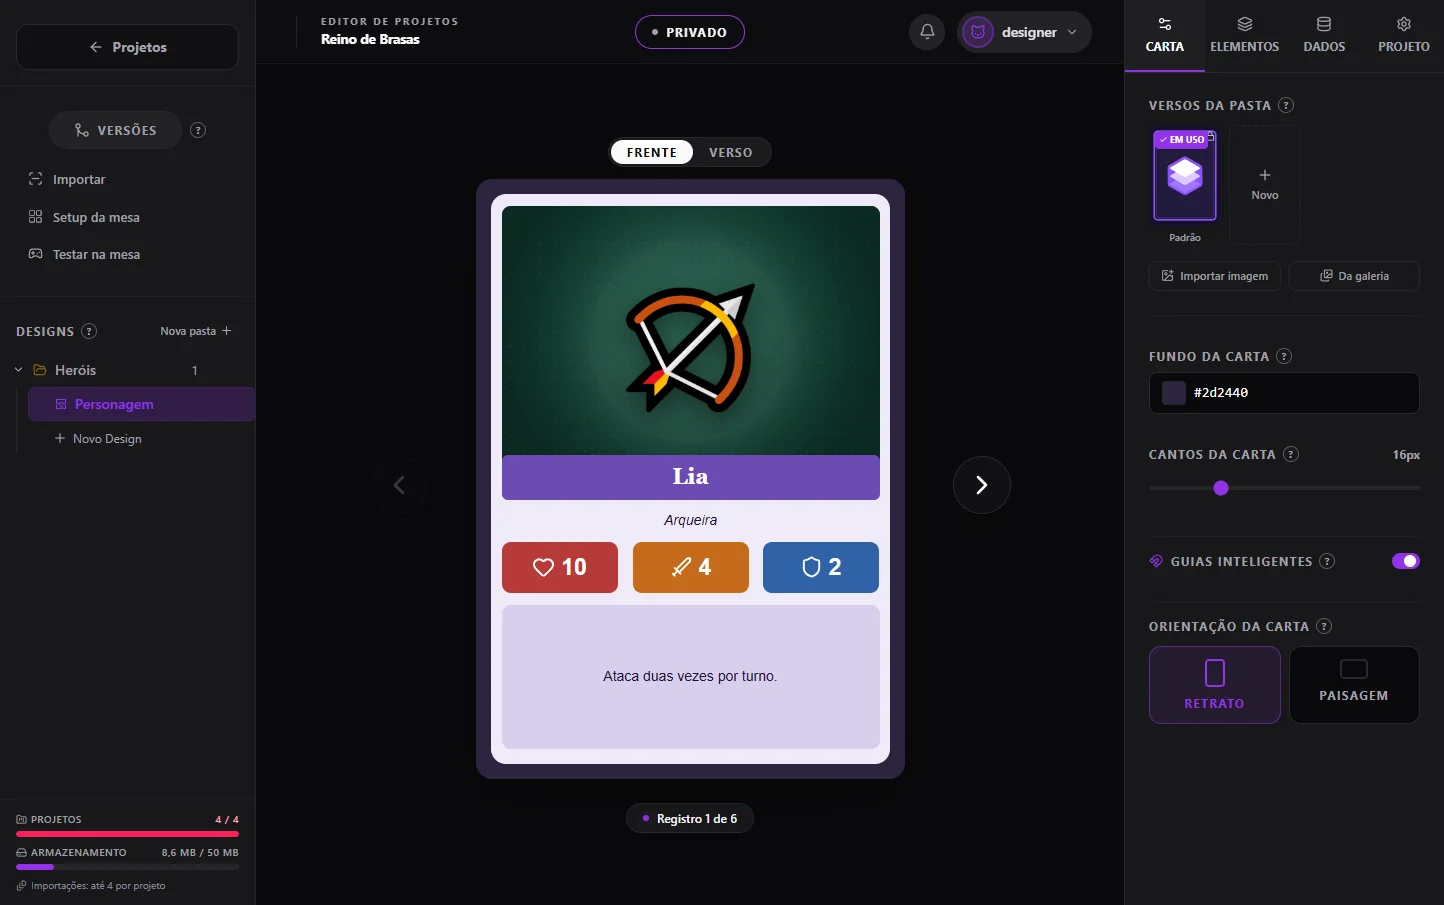
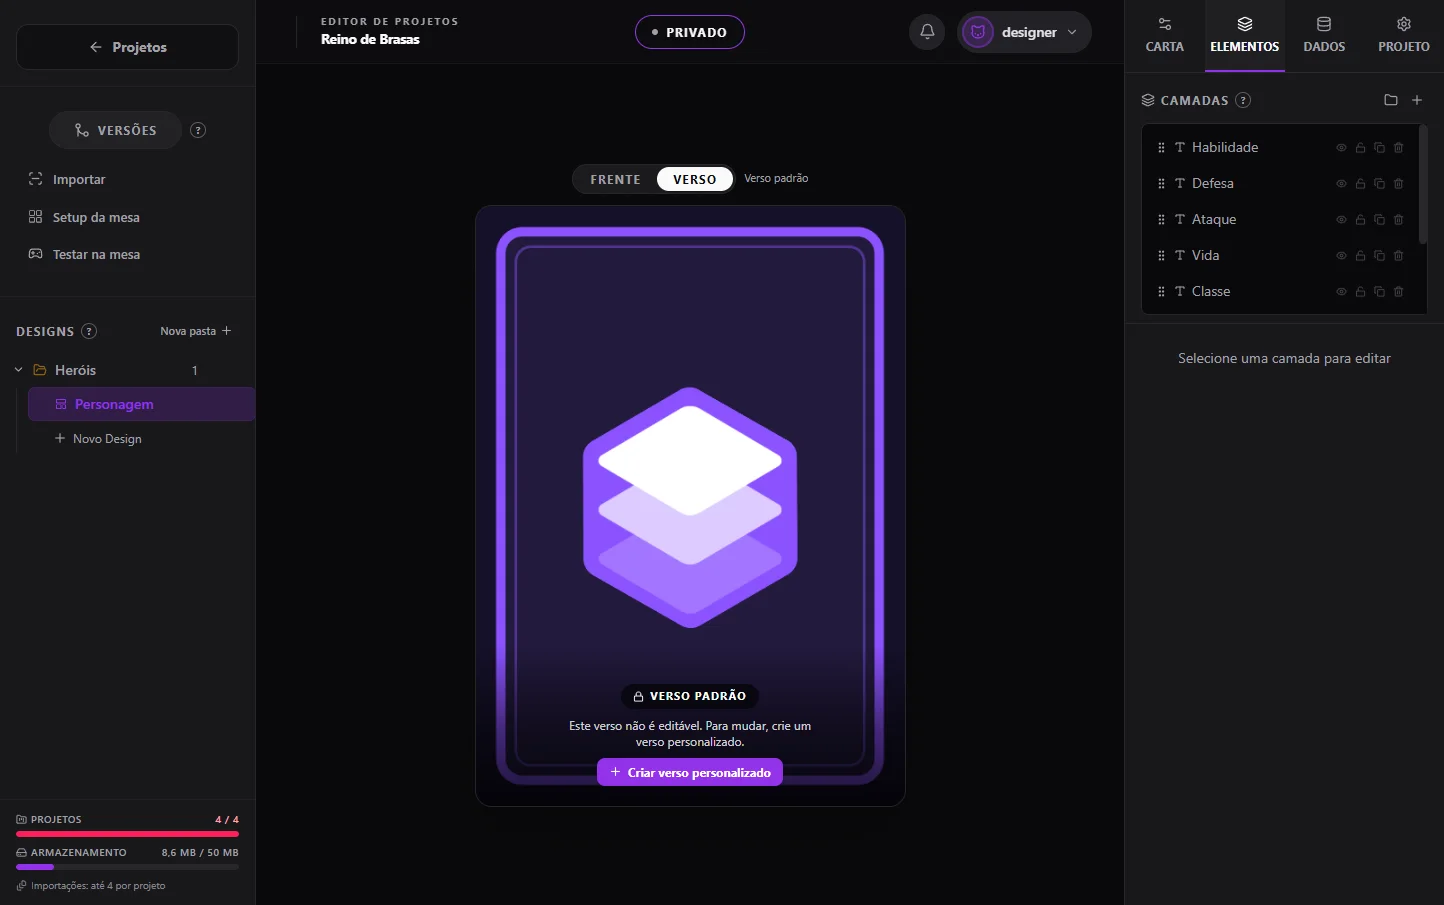
Switch between Frente (Front) and Verso (Back) above the card. With no setup, the folder uses the Dice on Top default back, which is not editable.
To have your own, click Criar verso personalizado (Create custom back). You can also import an image or pick one from the gallery in the “Carta” panel.
The back applies to the whole folder, so all its cards share the same one.
Step 9
Create a version and export
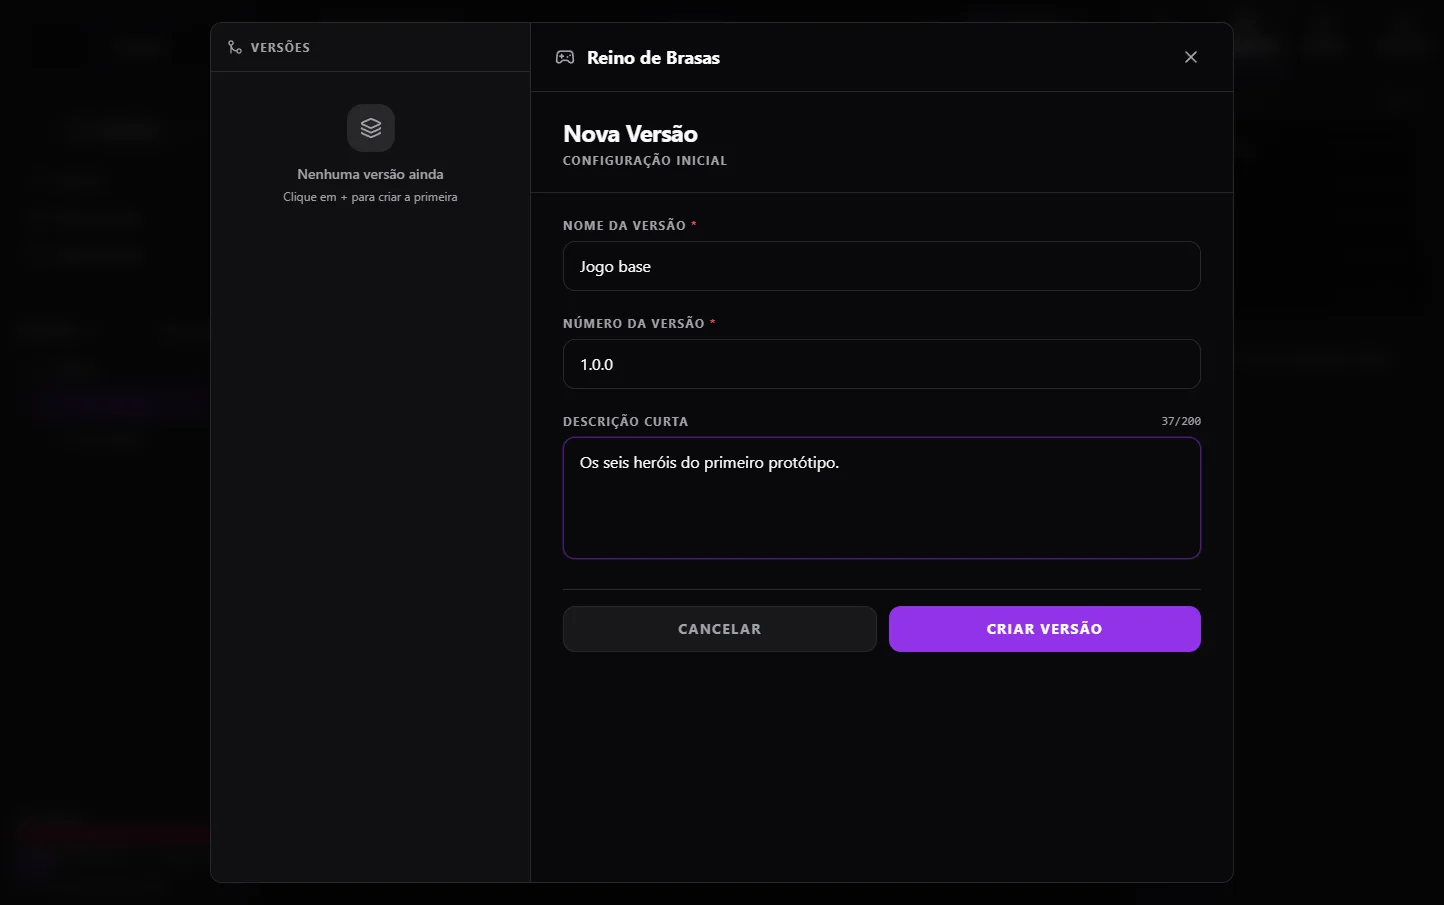
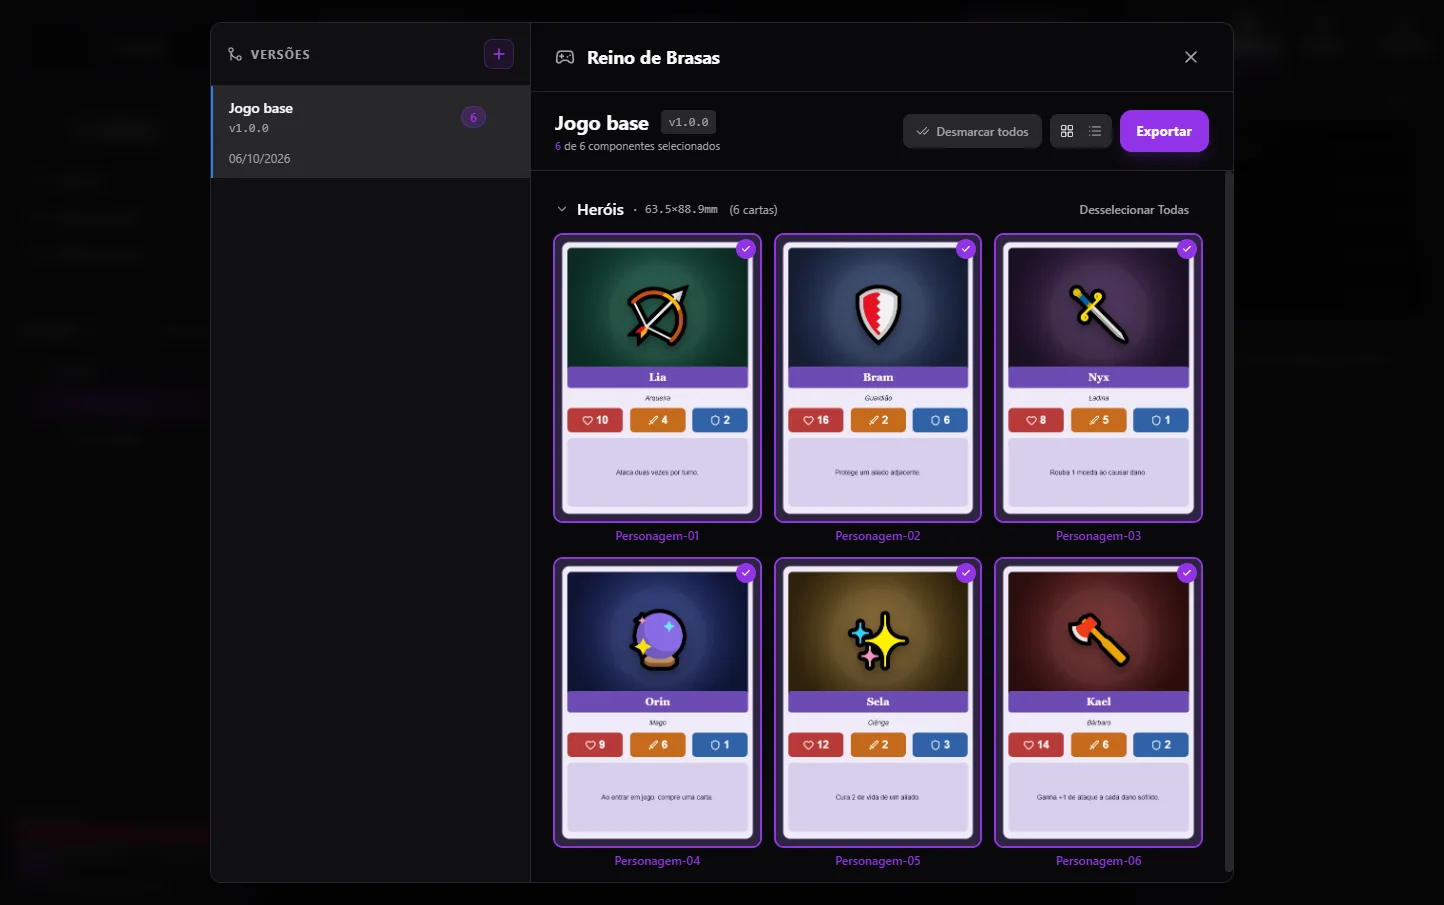
A version is a snapshot of the game at a moment, like “Jogo base 1.0.0” (Base game). Open Versões, click Criar primeira versão (Create first version) and enter a name, a number and a short description.
Dice on Top generates the images for all cards and shows the result. Tick or untick the ones to include and click Exportar (Export).
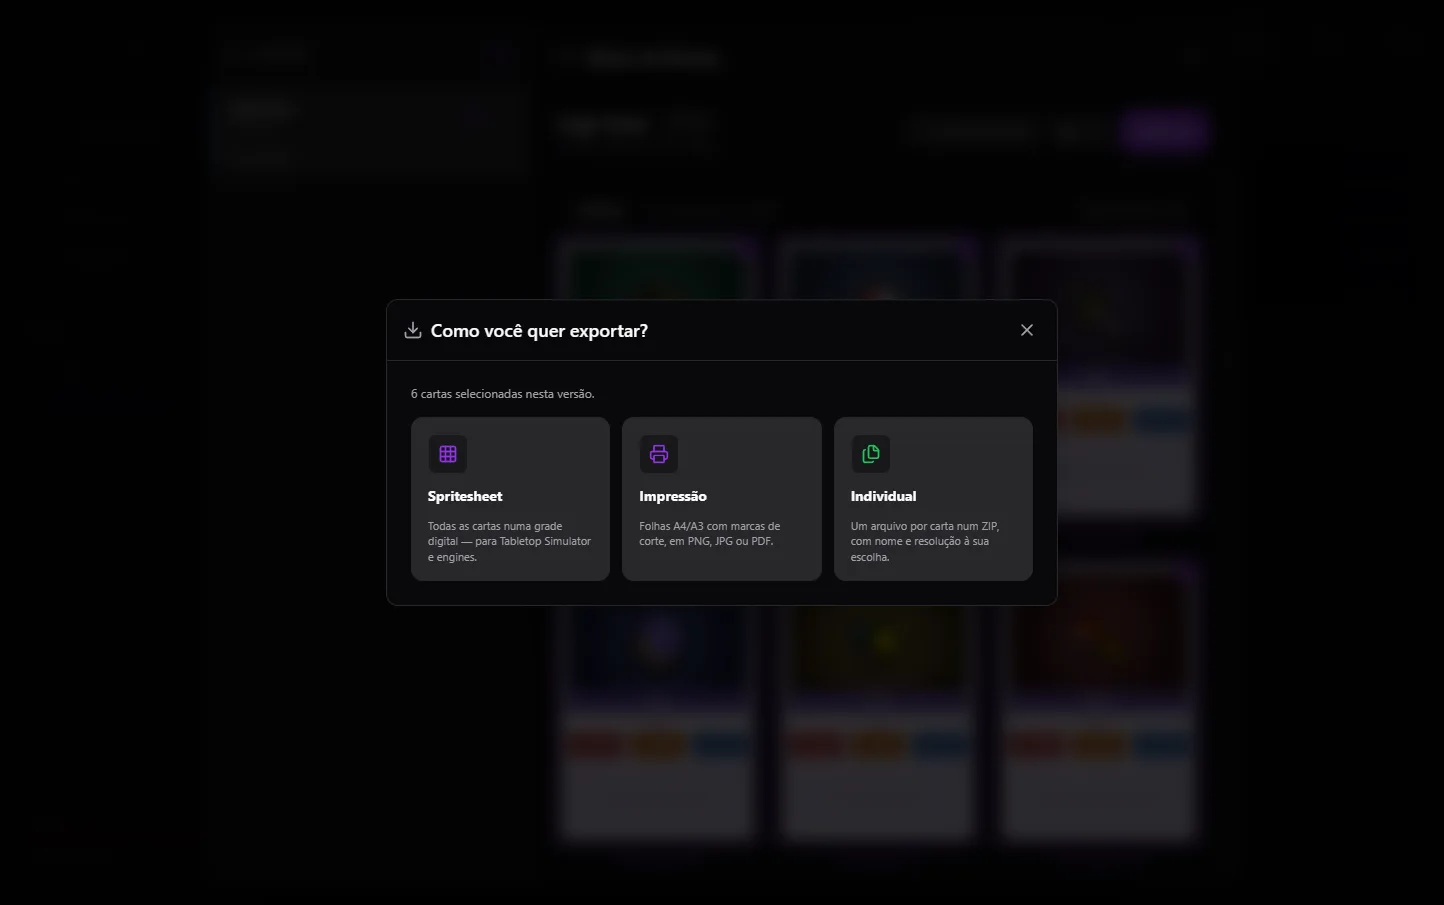
There are three ways to export. Spritesheet puts everything on a digital grid, for Tabletop Simulator and engines. Impressão (Print) makes A4 or A3 sheets with cut marks, as PNG, JPG or PDF. Individual gives one file per card, in a ZIP.
If you change the design later, the version tells you it is out of date. Generate it again before exporting.
Step 10
Set up the table and play
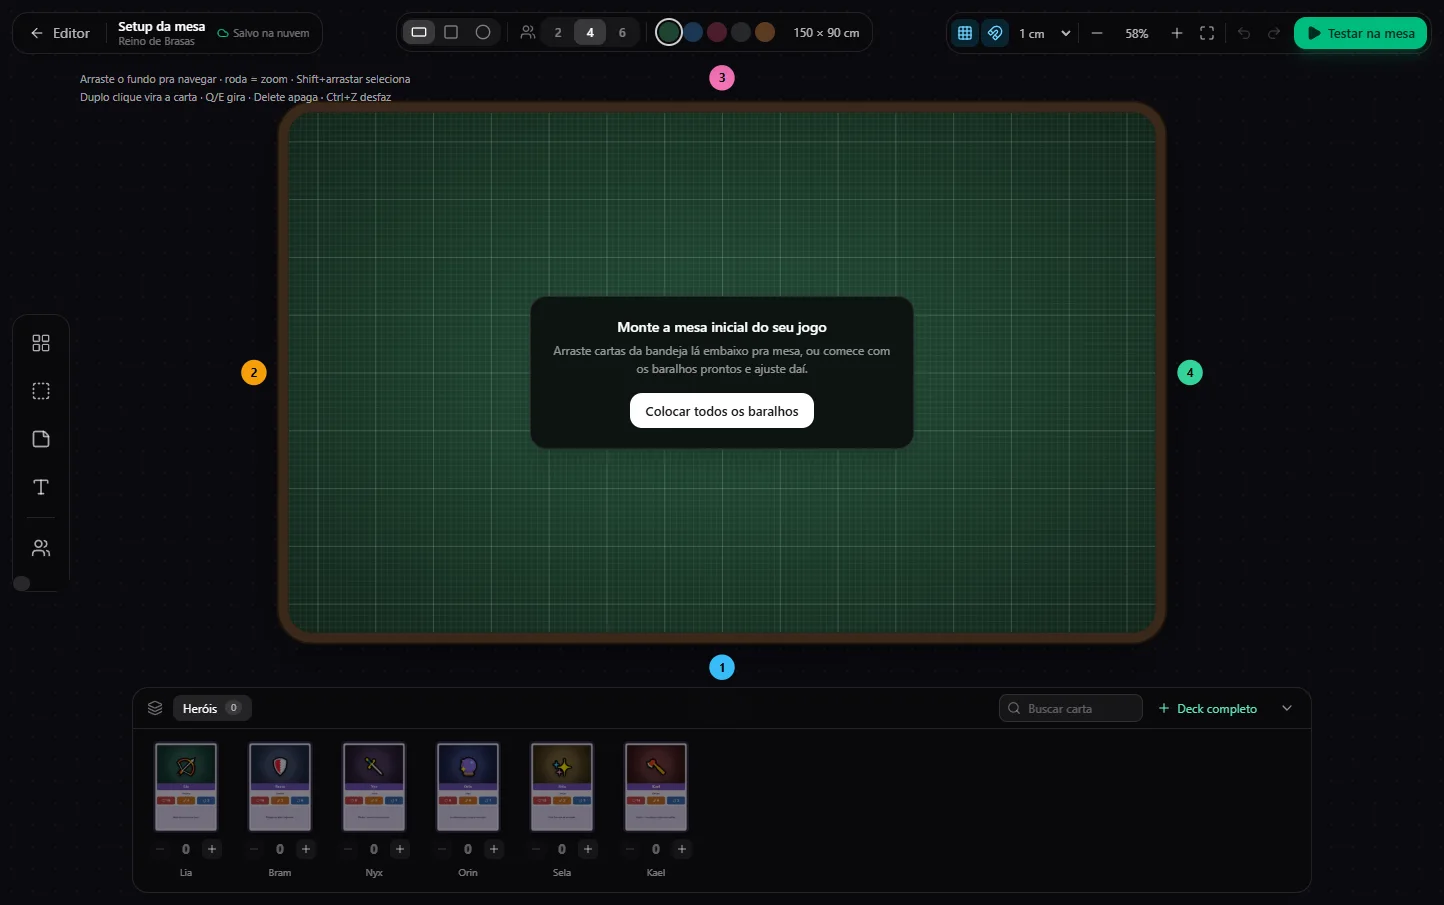
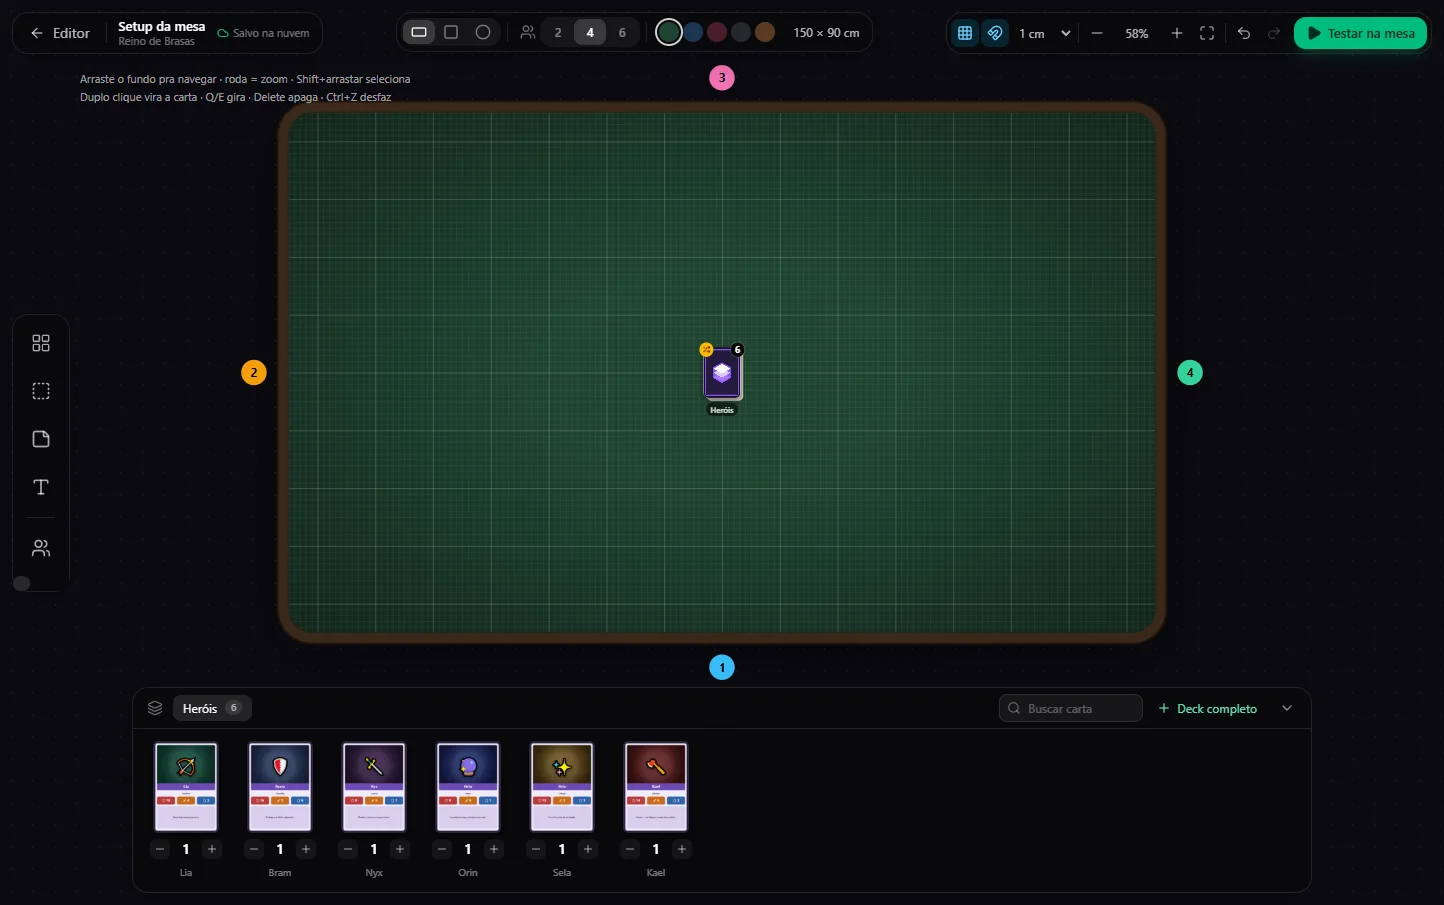
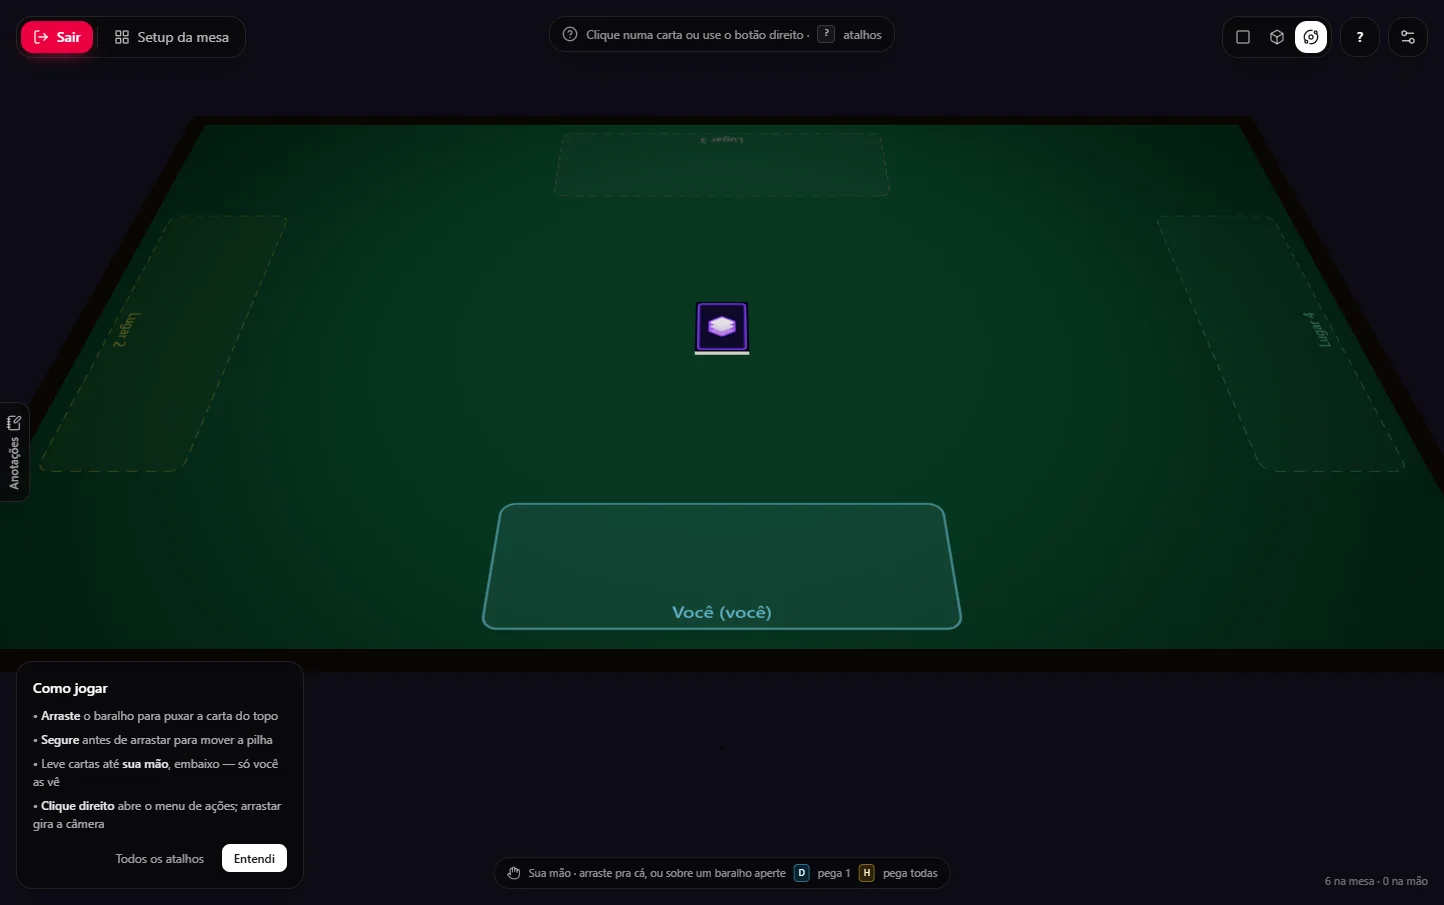
Open Setup da mesa (Table setup) to define how the game starts: table shape, number of seats, mat color and pieces. Click Colocar todos os baralhos (Place all decks) to put the deck in the center, or drag cards from the tray at the bottom.
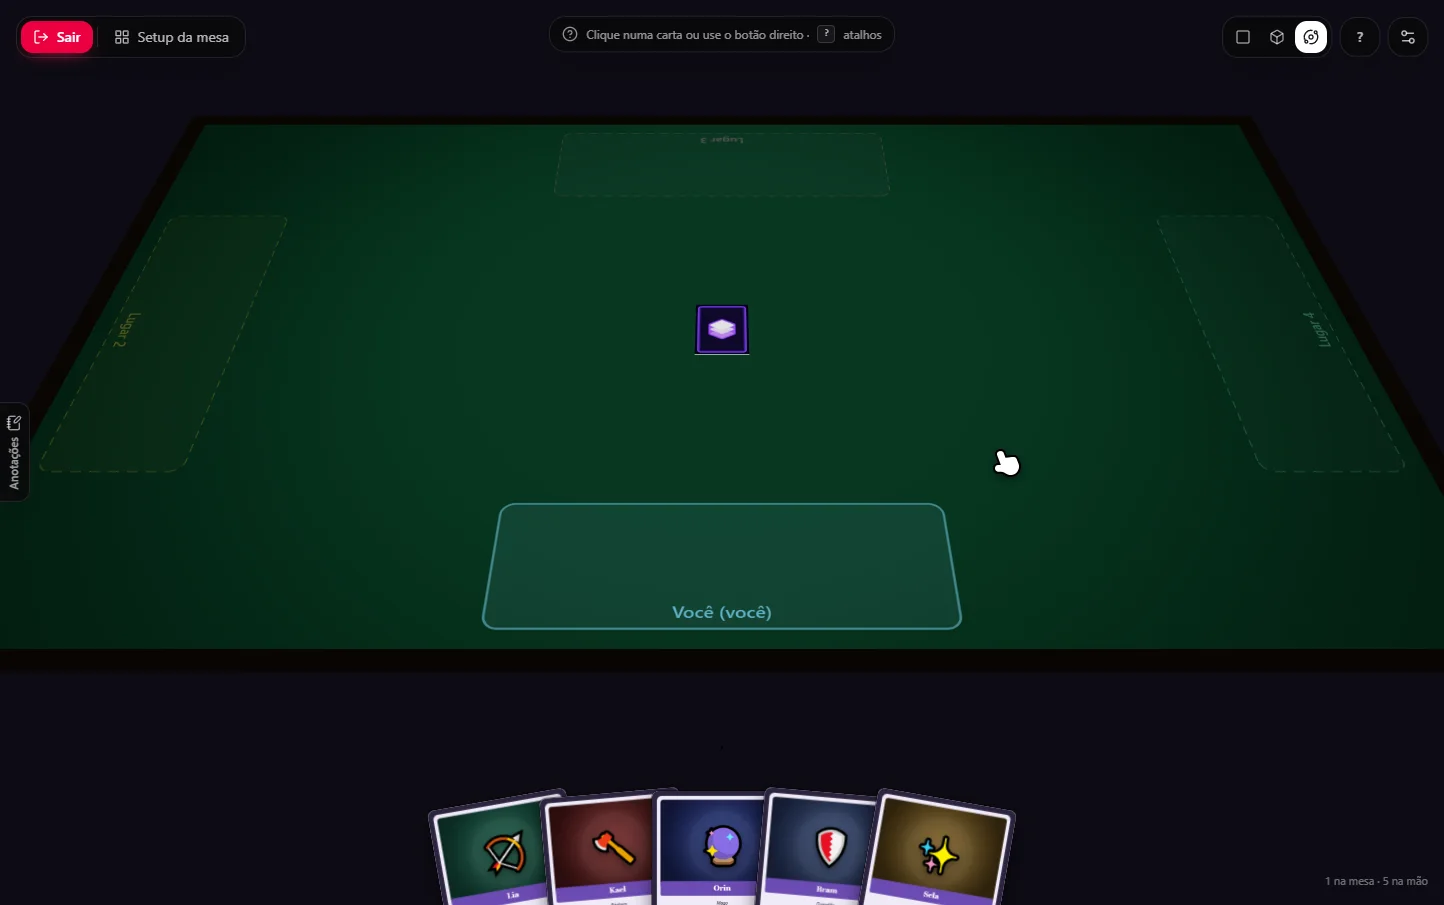
Then click Testar na mesa (Test on the table). The 3D table loads your cards and the “Como jogar” (How to play) tip explains the controls: drag the deck to pull the top card, press D over it to draw one and H to take them all, and right-click to open the action menu.
The cards you draw go to your hand at the bottom of the screen, and only you can see them. To play with other people, use the invite option in the room panel.
Press the “?” button in the corner of the table to see all shortcuts.
What now?
You now have a game you can print and play. From here it is all iteration: tweak the numbers in the table, generate a new version and test again.